Deprecated: Function get_magic_quotes_gpc() is deprecated in /home/perryhoodproperties/public_html/blog/wp-includes/load.php on line 651

Notice: Trying to access array offset on value of type bool in /home/perryhoodproperties/public_html/blog/wp-includes/theme.php on line 2241

Deprecated: Function get_magic_quotes_gpc() is deprecated in /home/perryhoodproperties/public_html/blog/wp-includes/formatting.php on line 4387

Deprecated: Function get_magic_quotes_gpc() is deprecated in /home/perryhoodproperties/public_html/blog/wp-includes/formatting.php on line 4387
perryhoodp, Author at Perry Hood Properties, Inc. - Page 6 of 22
Deprecated: Function get_magic_quotes_gpc() is deprecated in /home/perryhoodproperties/public_html/blog/wp-includes/formatting.php on line 4387

Deprecated: Function get_magic_quotes_gpc() is deprecated in /home/perryhoodproperties/public_html/blog/wp-includes/formatting.php on line 4387

Deprecated: Function get_magic_quotes_gpc() is deprecated in /home/perryhoodproperties/public_html/blog/wp-includes/formatting.php on line 4387

Deprecated: Function get_magic_quotes_gpc() is deprecated in /home/perryhoodproperties/public_html/blog/wp-includes/formatting.php on line 4387

Deprecated: Function get_magic_quotes_gpc() is deprecated in /home/perryhoodproperties/public_html/blog/wp-includes/formatting.php on line 4387

Deprecated: Function get_magic_quotes_gpc() is deprecated in /home/perryhoodproperties/public_html/blog/wp-includes/formatting.php on line 4387

Deprecated: Function get_magic_quotes_gpc() is deprecated in /home/perryhoodproperties/public_html/blog/wp-includes/formatting.php on line 4387

Deprecated: Function get_magic_quotes_gpc() is deprecated in /home/perryhoodproperties/public_html/blog/wp-includes/formatting.php on line 4387

Deprecated: Function get_magic_quotes_gpc() is deprecated in /home/perryhoodproperties/public_html/blog/wp-includes/formatting.php on line 4387

Deprecated: Function get_magic_quotes_gpc() is deprecated in /home/perryhoodproperties/public_html/blog/wp-includes/formatting.php on line 4387

Deprecated: Function get_magic_quotes_gpc() is deprecated in /home/perryhoodproperties/public_html/blog/wp-includes/formatting.php on line 4387

The Benefits of Opting For a Dual-Flush Toilet

You may have been in a friend’s bathroom or the bathroom of a business in the past few years and noticed something interesting about the toilet — options. As Americans, we’re used to multiple options in daily life, but deciding how much water we want to use when we flush our toilets is fairly new for us. In this piece, we’re going to look at some of the benefits of a low-flow dual-flush toilet and why you may want to consider one for your home.

How a Dual-Flush Toilet Works

If you’ve never used a low-flow or dual-flush toilet, the operation is fairly straightforward. Using either a lever or mechanical push-button flushing mechanism, you have two options: (a) an option that uses about half or less of the water in the tank and (b) an option to use all of the water in the tank. The idea is that different uses of the toilet require differing amounts of water (ahem, #1 or #2). Let’s dive into the features and benefits of a low-flow dual-flush toilet in your bathroom. (Ok, maybe “dive” wasn’t the right wording…)

Dual-flush toilets save water.

North America is a fairly water-secure place, making the amount of water we use not being of major economic concern in past decades. Most Americans are now seeing the economic benefit of becoming more efficient with how we use energy and resources. Between LED bulbs, energy-efficient windows, and advanced insulation, we’re seeing green — both in terms of environmental responsibility and longer-term economic savings. For standard toilet tanks, anywhere between three to four-and-a-half gallons of water is used with every flush — much of that water unnecessary to accomplish the desired result. In the average dual-flush toilet, one flushing option uses about just under a gallon of water while another option uses about two gallons of water, depending on the model.

Dual-flush toilets save time.

It may seem odd to think about the time-saving element of a toilet, but it’s true. If you’re honest with yourself, waiting for a tank to fill up for an additional flush can be awkward at best and frustrating at worst. The fact that you’re usually in a precarious position certainly doesn’t help the situations. Because dual-flush toilets hold significantly less water, the time it takes for them to refill is usually just a few moments.

Dual-flush toilets save money.

When compared to a standard toilet, the cost savings in the form of your water bill means that a dual-flush toilet will pay for itself in around six years. Also, as the demand for dual-flush toilets has increased in the last decade in the United States, they have become increasingly affordable — usually on par with standard toilet prices or sometimes even more affordable.


Whether you’re looking to remodel your home or build your dream home, a dual-flush toilet is a great environmentally-friendly accent to your bathroom that will also save you money for years to come. For additional help building your next home, consult the property building professionals from Perry Hood Properties.

4 Ways a Backyard Patio is Good For Your Health

There are fewer better ways to bookend your workday than by spending time outside. Whether to help you wake you up or to decompress after the end of a busy workday, spending time outside feels great. Did you know that spending time outdoors, such as on an outdoor backyard patio, is also tremendously good for your health? In this piece, we’re going to look at four the health benefits that come with an outdoor backyard patio.

1. Vitamin D Absorption

While getting vitamin D from your food is important, specialists also recommend getting a healthy dose of vitamin D through your skin from the sun. Even just spending 20-30 minutes in the sun a few times a week is a great way to get the necessary vitamin D. This could mean enjoying a backyard patio space with a cool drink and a good book a few times a week.

2. Getting Fresh Air

Between our offices, cars, and houses, we spend the majority of our time indoors. Occasionally getting the fresh air that a backyard patio can provide can do wonders for our health. Not only does getting fresh air give your immune system a break from combating germs that exist indoors, but it has also even been shown to improve your mood. Getting your daily dose of fresh air may be just what the doctor ordered.

3. Sleeping Better Through the Night

It may seem strange to say that spending time on an outdoor patio can help you sleep better, but it’s true. Your body’s natural circadian rhythms that determine when you should sleep are very delicate. Imagine trying to set your watch when you don’t have any other clocks. When you spend time outside, your body gets a break from artificial lights and screens to properly reset itself according to the amount of daylight that is available.

4. Improving Seasonal Affective Disorder (SAD)

Have you ever noticed a sense of tiredness, gloominess, and even depression during the fall and winter months? Well, it’s not just you — Seasonal Affective Disorder is a condition that can make you feel morose during periods of decreased sunlight. One way to keep the winter blues at bay is by spending time outside. Doctors claim that spending time outdoors can increase your mood during these times of year — even if it’s cloudy or overcast.


When you’re building a new house or looking to make improvements on an existing home, consider investing in your health by building a outdoor backyard patio. For help building this and any part of your custom dream home, look no further than the home building specialists at Perry Hood Properties. See how we can make your dream a reality today.

6 Questions To Ask Before a DIY Remodel Project

After living in a house for any period of time, there will probably be a few things you’d like to change. Juiced up on home improvement shows and home remodeling YouTube tutorials, you may feel up to the task of taking on a remodel project yourself. Before you swing a sledgehammer and make your living room “open concept” the hard way, there are a few questions you should ask yourself before undertaking a DIY home remodeling project.

1. Do you know what the heck you’re doing?

There’s a reason why this is the first question you should be asking yourself — this is your house we’re talking about. If you’re already skilled in construction-related tasks, this may be the easiest question to answer. If you’ve never swung a hammer in your life, no number of YouTube videos will properly prepare you for a home model of any significance. Gain some experience with smaller projects before attempting to reshape the look of your home. Just because you can paint a nursery doesn’t mean you should be bringing down a wall.

2. Are you ready for some mess?

There is a nice idea that you can live in your home while you’re remodeling it. While this is true, the area being remodeled will not be livable space. Also, wherever you are renovating will be a disaster zone of debris, material scraps, and a variety of other substance depending on what you’re doing. Just plan on making a huge mess and likely renting a dumpster.

3. How much money do you think this will save?

Many take on a DIY remodel project in order to save some money. While this seems right in theory, it rarely pans out this way on paper for the average homeowner. Construction experts typically charge for their expertise, not just for their time and muscle. If you feel that you could do the same work in the same amount of time, a DIY remodel may actually save you money. If not, it will likely be “cheaper” for you in terms of time and money to have a professional take on the job. They will likely do a better job and in less time than you can.

4. How complex is this project?

Some remodeling projects are totally feasible for the inexperienced. Painting walls, changing out kitchen or bathroom hardware, changing out shower heads — virtually any homeowner can accomplish these tasks. However, tasks involving electrical, plumbing, ventilation, load-bearing walls, masonry, built-in furniture — these should probably be handled by a professional.

5. Is it even legal for you to do this?

It sounds funny because it’s your house, but there are actually permits involved with some extensive remodeling jobs. It seems like your worst punishment for remodeling should be whatever expensive mess you make, but the consequences could be even more severe. Check to see what paperwork is required.

6. Is this a one-person job or will you need help?

Before you take on any advanced DIY project, even if you’re fairly handy, determine if you will need any help. When handling larger materials or making adjustments in a tight spot, you may need a second set of hands or an extra back. If this is the case, do you know someone willing to work for pizza and beer? If not, how much will it cost to hire someone? Could a professional crew do it for the same price in less time?

We’re not saying that home remodeling projects are best left to the professionals, but simply that you shouldn’t overestimate your own abilities. Even though some TV shows can make it look easy, know that pretty much everything you see on TV is fake. Carefully plan out every phase of your DIY home remodel, counting every hour, every cost, and every mess. Make sure you’re not actually getting in over your head.


In order to avoid home remodel projects yourself, let the home construction professionals at Perry Hood Properties build your dream home. We’ll build it just how you want it on the first go!

How To Hide Your TV In Your Living Room

“Environment is the invisible hand that shapes human behavior.” —James Clear

Putting the Living Back In Your Living Room

We’ll admit it — when we walk into a room with a very prominent screen and a remote control within reach, our first instinct is to turn on the TV and veg out. It’s just too convenient not to do. While this feels like the natural activity of the living room, for those wanting to limit their TV viewing, one would need to change their environment. A great way to limit the instance of any habit is to make it less convenient. If your television is begging you to watch it, consider concealing it somehow. In this piece, we’re going to look at a few ways to hide your television when it’s not in use.

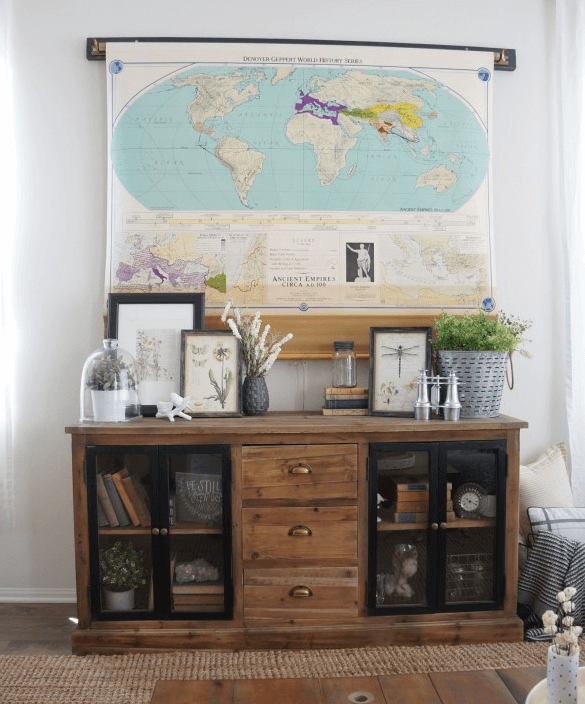
Cover Your TV With a Pull-Down Map

covering flatscreen tv with map


Design idea from The Inspired Room

This first simple option is great for those who are wanting to limit their TV viewing while also wanting to strengthen their geography chops. This method works best with very flat televisions that are very close to the wall. Maps can be found through different classroom supply companies or even looking around antique shops.

Stow Your TV In a Cabinet

hiding tv in cabinet

We’ve all seen the closing entertainment center. While this is effective, most people know what is within the entertainment center cabinet and will be naturally drawn towards it. However, when concealing the television within a cabinet that may serve a different purpose, this can change the room from being “The TV Room” to being “a Living Room That May Happen to Have a TV.” This change may not seem to make much difference at first, but it can ultimately change the feel of the room when the television is not in use.

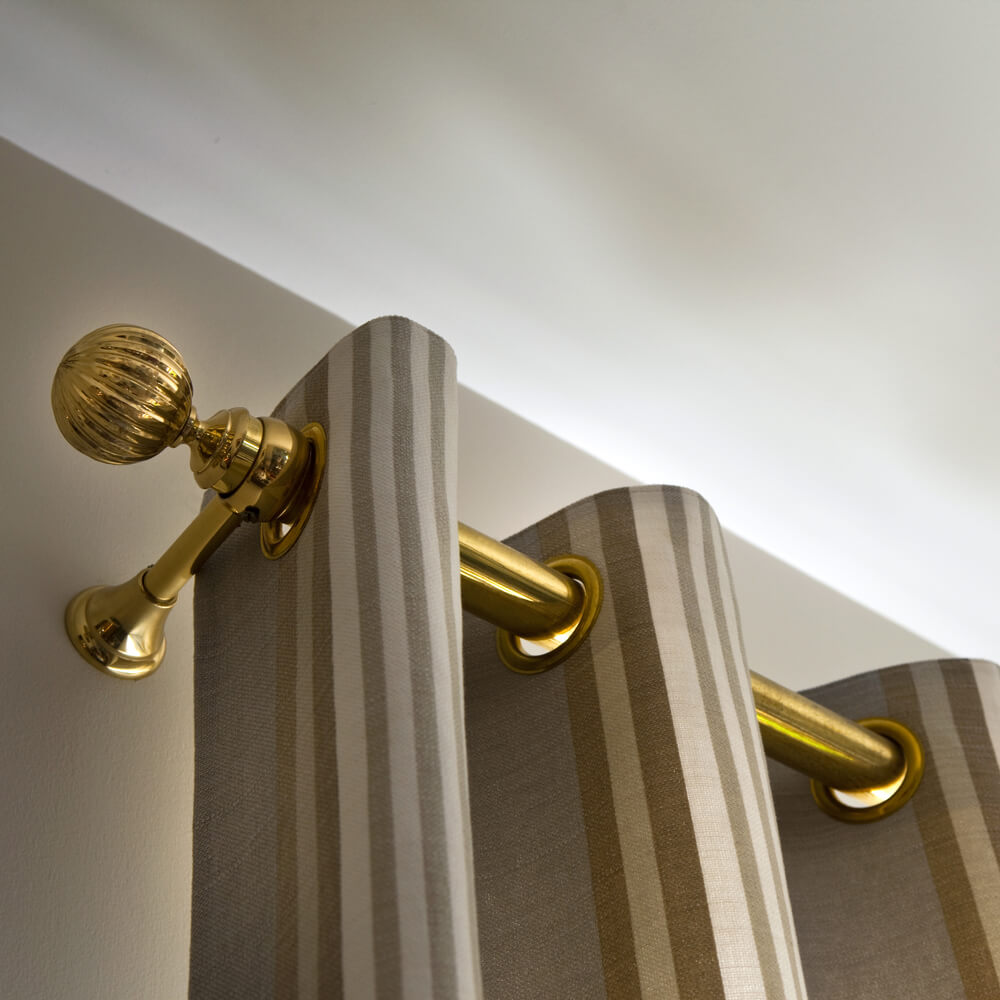
Concealing a TV with Curtains

hiding tv with curtains

When you don’t wish to enjoy the light or scenery of a window, you draw the curtains closed — why should a television be any different? Install a rod above a wall-mounted flat screen television with decorative curtains that split in the center. If you don’t feel like watching or even seeing the television, simply draw the curtains closed. Open the curtains for television-viewing time. You’ll feel like you’re attending the theatre every time you binge your favorite Netflix show.  

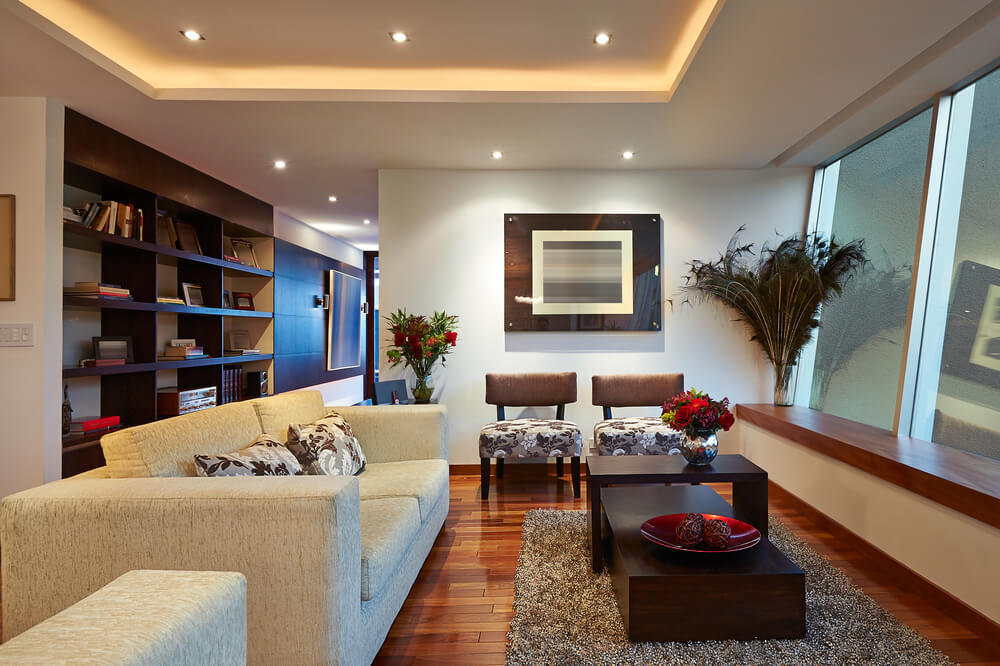
Including TV Stowing Within the Design

hiding tv with curtain design

For home shoppers who really want to take their television-stowing to the next level, this may be one of the many attributes of a custom house build to consider. From designing a living room that is conducive to conversation to an all-around design you look forward to coming home to, the home building professionals at Perry Hood Properties can make your dream house a reality.

7 Money-Saving Tips for New Home Owners

If you’re looking at becoming a homeowner or you just recently became one, we’d like to offer our congratulations on this step in your life! Homeownership is a great feeling. Still, with all of the perks of homeownership (no more rent rate fluctuations, being able to do what you want with your home, etc.), homeownership can have some hidden costs. In order to help you save as much money as possible in regards to owning a home, we’ve put together a list of seven tips easy-to-implement tips.

1. Go the efficient route when buying new appliances.

There’s a very likely chance that you will have to buy some new appliances for your new home. When looking for new washers, driers, refrigerators, and other appliances, go with the most efficient models. These may be a touch more expensive up front, but you’ll definitely spend much less in the long run on your energy and water bills.

2. Use masking tape to track the possible progress of cracks in the basement foundation.

If your home has a basement, it pays to take a look down there for a number of reasons. A major reason is to check the foundation for cracks. Even though most smaller cracks don’t usually expand and pose little threat, larger cracks are best treated before they expand too far. Place pieces of masking tape across the cracks, marking each piece of tape with a date. If the crack expands too far, you’ll definitely be able to tell thanks to the tape. Check the tape around the time you change your smoke alarm batteries every year. If you notice torn or stretched tape, contact a foundation repair specialist to fix it before it becomes too expensive.

3. Make the switch to LED light bulbs.

From being able to customize lighting moods to saving money in the long run, considering switching all of your light bulbs to LED. Even though LED bulbs are more expensive than their alternative bulbs, they last a significantly longer time. They also practically sip electricity in comparison to incandescent bulbs. If you’re not sold yet, customizing the color temperature for every room of your house is possible by selecting certain LEDs.

4. Change out the toilets to low-flow, dual-flush toilets to save water.

Even though your toilet has a very real purpose, you’re almost literally flushing cash down the drain in the form of your water bill. Wouldn’t it be nice to flush less cash each time? A dual-flush toilet is a toilet with a two-part water tank. Each sub-tank has a button or lever so it can be independently operated. When you only need a light flush, you can use less water and when you need more water, that is also available. Replacing the toilet itself isn’t drastically more expensive and there are also retrofit kits to make existing toilets dual-flush.

5. Check out the attic insulation situation.

Even though a house’s attic looked ok when you purchased the house, making sure the insulation in the attic is appropriate can help make your home vastly more efficient. If the attic is unfinished, you should see ample insulation between the beams. Between each beam should be no less than six inches of undamaged insulation. If you do not see this amount of insulation, installing more insulation may be necessary. If you live in colder states, it may make sense to install even more than six inches of insulation. The U.S. Department of Energy has created this very handy guide on home insulation.

6. Replace all air filters in your new home.

Breathing a sigh of relief after closing on a new home can be harder to do with old air filters hanging around. Even if it doesn’t seem necessary yet, go ahead and replace the air filters for your new home’s HVAC system. It’s usually very inexpensive to do, takes ten minutes to complete, and greatly increases the air quality of your new home. In addition to freshening the air in your home, new air filters also make life easier on your HVAC system, resulting in less wear on components and lower energy bills for you.

7. Install surge protectors for your major electronics.

While you’re moving your television, stereo, and computers into place, now is a great time to purchase and install surge protectors. A power surge from a lightning strike or other malfunction can damage expensive electronics. Most surge protectors are not overly expensive and come with many other cost-saving features.

These are just a few cost-saving tips for new homeowners. If you know any others, we’d absolutely love to hear them. If you’re considering building a custom house of your dreams, look no further than the home construction professionals at Perry Hood Properties.
4 Benefits of Living In The Suburbs

If you’re looking to build a new house, there’s a very good chance that you won’t be doing so in an established city neighborhood (unless you plan on doing some home demolition). Even though you won’t be able to live in that historic city district, there are a lot of benefits of suburban living over city life. In this piece, we’ll look at some benefits of suburban living that may make your city friends a touch jealous.

1. Traffic? What traffic?

cars in traffic above shot

If you’ve ever lived in a medium-to-large city for any time, you had to factor in the amount of time you’ll likely have to sit in traffic. In the United States’ largest cities, residents can expect to spend anywhere between 54 hours (Dallas, TX) to 102 hours (Los Angeles, CA) in traffic a year. While you still may commute into the city for work if you live in the suburbs, getting around is a breeze by comparison with little to no traffic.

2. Suburbs have never been more convenient.

strip mall

Once upon a time, the biggest argument against living in the suburbs was the lack of convenient access to everything from big box retails to movie theatres and beyond. These days, shopping centers have popped up in almost every suburban location, putting you in closer reach of just about anything you’d want. Even if you can’t find some specific items in town, that’s what Amazon is for, right?

3. The suburbs are much quieter by comparison.

woman enjoying peace and quiet

Cities are noisy. Whether it’s first responder sirens, traffic, nightlife, or construction, the volume of the average urban area clocks in at just around 75.4 dBA. That is the equivalent of a person speaking loudly at you 24 hours a day. Lacking the traffic, perpetual sirens, and usually having natural sound-dampening elements, suburban life is significantly quieter. In fact, many who move from the city to the suburbs frequently report having to get used to just how quiet their new neighborhood is.

4. You can live in the house you want.

couple enjoying home

In many cities, especially in historic neighborhoods, houses can be very expensive. Not only are these houses pricey, but they were rarely built by the people living in them. Most of the people living in the city sacrifice some features they want in order to live in the city. Alternatively, when you build a home in the suburbs, you can often design it precisely to your specifications. From the landscaping to the home layout to all of the details, building a new home in a developing suburban community allows you to have a house that is uniquely you. In order to learn more about this process, reach out to the custom home builders from Perry Hood Properties

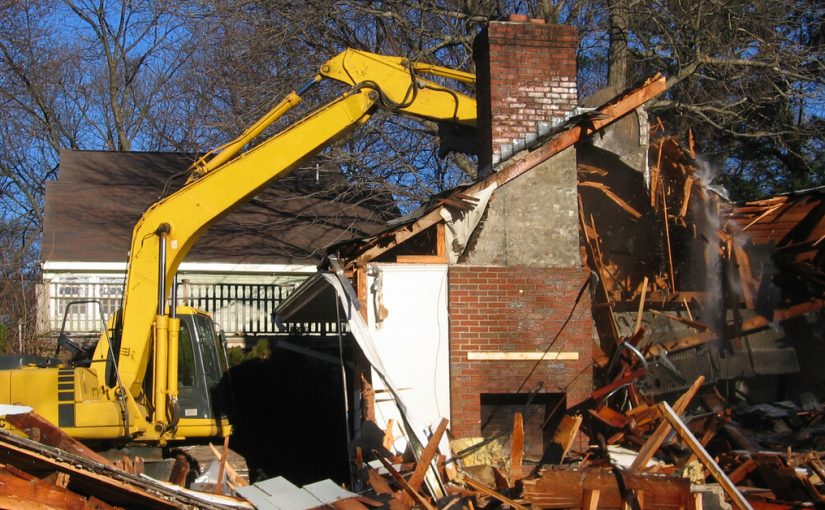
The Steps in Demolishing an Older House

Moving into a historic neighborhood can be appealing, but moving into older homes can be problematic. Sometimes, demolishing a decrepit home in order to make way for new home construction can be a great way to have the best of both worlds as well as revitalized aging communities. In this piece, we’re going to look at the necessary steps in demolishing an older house to make way for new house construction.

Weigh Your Demolition Options: Deconstruction vs Mechanical Demolition

Before you start demolishing an older home, you’ll want to consider which method of demolition will be best. You may know precisely what you want in your new home and the older home is simply taking up space as well as time in your build plan. For scenarios where time is of the essence, a complete mechanical demolition with heavy mechanical equipment may be the quickest route. If you would like to recycle much of the older house’s material or possibly reuse any elements, manual deconstruction would be best. Many actually use both of these methods in tandem — recycling and reusing what they can while then demolishing the rest of the home with heavy equipment.

Look for Contractors To Help

If you’re reading this, there’s a good chance that you’re not already in the construction and demolition industry. For this reason, you will want to seek out the help of a demolition or construction contractor to help with the home’s teardown. Find a licensed and insured home construction specialist. Many of these homebuilders are also experienced in demolition but double-check by asking about similar projects they’ve completed before.

Home Inspection For Your Protection

Even though you’re tearing it down, it’s still crucial to have the home inspected for hazardous materials. Many older homes contain dangerous materials such as lead paint, asbestos, or mold. In order to stay safe and legal, you will want to deal with these before you begin your official demolition.

Get The Paperwork Squared Away

Demolishing a house requires a lot of paperwork — especially if you plan on tearing down a house in a historic area. A city website or City Hall should able to outfit you with all of the paperwork you will need to fill out and submit in order to begin demolition.

Unhooking From The Past: Disconnect All Utility Lines

The house you’d like to remove is probably hooked up to a wide array of utility lines. Whether electric, sewage, water, or gas, this home will need to be disconnected from them all before demolition is to take place. Also, don’t forget unground septic and oil tanks that may be out of use that may need to be removed. Check with the utility companies as to the best ways to disconnect these lines and cap them off in a way that is safe and legal.

Talk to the Neighbors

Demolition is a loud and messy business. Make sure that you’ve spoken with the neighbors in the houses surrounding the home you plan to demolish. Give them all of the details surrounding the demolition including what time of day demolition will take place, how loud it may get, and how long it will take. The better you communicate now, the fewer angry voicemails you’ll receive later.

Fence Off Dangerous Demolition Zones

Though your demolition contractor will already do this, make sure that potentially hazardous areas are all securely fenced off for the neighborhood’s protection. You want to make a good impression on your new neighbors. The best way is to keep them safe from your own property.

Get To Demolishing

After these bases are covered, the demolition process on your house can usually begin. Demolition usually takes anywhere from a day to a week depending on the size of the crew and the equipment used. Once the house is fully demolished, all remnants of the house should be completely removed — either by commercial refuse companies or recycling organizations. No trace should remain — not even the foundation. All that should be left is a spot of dirt where the house once stood.

Begin Building Your New Home

When you demolish a house, you’ve essentially punched an ugly hole into an otherwise beautiful neighborhood. For the sake of cost and momentum, you’ll want to start the new home construction process immediately. In order to custom-design the home of your dreams and build it out, look no further than your home construction at Perry Hood Properties. Every last detail can be altered to your liking for a house you’ll immediately want to come home to.

4 Advantages of Design-Build Delivery For Home Construction

Deciding to move can be quite stressful. Between the mortgage and the process of moving, it can take its toll. In order to make the home building process easier, many are opting for design-build delivery services. In this process, one company manages the entire home creation process. From design-to-construction, everything is managed by a single entity. In this piece, we’re going to look at four significant advantages of the design-build delivery construction process when building a home.

1. You only have to reach out to one person.

One of the most stressful parts of building a new home is managing the people involved. Between hiring an architect to design your home to hiring a contractor to carry out their plan, simply making sure everyone is on the same page is a huge process to keep from going off the rails. With a design-build delivery process, you only need to talk to one company representative who can guide you all the way through the process. No cat herding necessary.

2. The people building your home are probably old pals.

On some builds, the designer and contractor may have never worked together before. They may be unfamiliar with each other’s work styles, preferences, and even just personality quirks. During a design-build delivery process, there’s a good chance that the designer and construction specialist have worked together on dozens, if not hundreds of projects in the past. If they can nearly finish each other’s sentences, they’ll definitely be able to finish your home efficiently — on time and on budget.

3. The entire team shares the same success criteria.

When the build process of a home is fractured amongst several different specialists, the main concern of each specialist is whatever they happened to work on. During a design-build construction process, the gauge for success is the completion of your house and your happiness. When the people building your home share the same criteria for success, this increases worker morale and leads to a better product. They’re all on the same team — Team You.

4. Your input on the project goes further.

During a traditional build, if you wanted something changed, you may have to express this point to several different specialists working on the project. Each time, your vision could become skewed or possibly not taken to heart. During design-build delivery of a new home, expressing your desires for your new home is as simple as reaching out to your contact with the company. Your input is taken seriously by the entire company and you receive the desired results.


If it’s time for a home upgrade, the home building specialists at Perry Hood Properties can make your dream home your actual home. Get started building your next home already.

Determining the Proper LED Color Temperature By Room

LED lights have become increasingly popular in recent years. Those who are environmentally conscious like how efficient they are — using, on average, just $1.83 a year to power, as opposed to incandescent bulbs that cost about $10.95 a year to power. Others simply like their astounding 10-15 year lifespan. LEDs are becoming the obvious choice in new home construction and retrofits in remodeling. Still, one of the past misconceptions about LEDs has been that they give off harsh, sterile light. Innovations in LED technology have increased the brightnesses and “color temperatures” of LEDs for commercial or residential use. In this piece, we’re going to talk about selecting the ideal LED color temperature for each room in your home.

LED Color Temperatures for High Productivity Areas

There are spaces in your home where you need to remain productive, focused, and have an eye for detail. Places like the kitchen, a home office, and the bathroom are places where work or personal maintenance is performed. In the kitchen, being able to properly determine the freshness of ingredients and observe how items are cooking is crucial. In a home office, you want to avoid the distractions of home life and remain focused on the task at hand. In the bathroom, you want to make sure that your makeup is absolutely perfect or that you did not miss any spots shaving.  In these high-performance areas, home builders and lighting experts usually recommend a colder LED color temperature and increased brightness level. The recommended LED color rating for areas of productivity in the house is usually about 3,000-5,000 Kelvin with a brightness of about 3,000-6,000 lumens.

Relaxation LED Color Temperature Areas

On the flip side of the LED color temperature scale, there are areas in your home where relaxation is the goal. The living room is going to be the most multi-functional room in the house with activities ranging from entertaining, reading, or watching movies with the family. Though often connected to your kitchen, your dining room should have a completely different feel from it — relaxing, calm, and pleasant. When it comes to your bedroom, relaxation and sleep are the room’s primary purposes. Many health professionals recommend removing sources of harsh light from bedrooms and even limiting screen time in the bedroom to promote rest. In these relaxing places, lighting experts recommend a softer light having an LED color temperature of about 2,000-3,000 Kelvin and LED brightness of about 2,000-4,000 lumens.


If you’re looking to build a new home with details, such as LED lighting, to your exact specifications, look no further than home professionals Perry Hood Properties. Our team of property experts can help you craft a home you’ll love spending time in for decades, if not generations, to come. Building your dream home has never been this simple.
Which Are Better: Quartz or Granite Countertops?

Whether you’re designing a new home from the bottom up or you’re remodeling an existing kitchen, you’re going to be forced with the difficult decision of picking what materials you want in your kitchen. These materials should be affordable, stylish, and capable of taking a beating. In this piece, we’re going to look at some of the pros and cons of granite countertops versus quartz countertops.

What Are Granite Countertops?

Even if you couldn’t point out granite countertops from other materials in a countertop materials lineup, you probably already know that granite countertops are all the rage right now. These countertops are made from cut granite: a 100% natural stone that brings a glimmering sophistication to any kitchen. Granite started out as an expensive luxury imported from Italy. With increased demand came an increased supply of more variants of granite from places like Brazil and India. The manufacturing process has become much more mechanized in recent years, making granite more affordable than ever before.

What Are Quartz Countertops?

Unless you’ve been staying on top of kitchen materials trends, you’re probably unaware of just how popular quartz is becoming — giving granite a run for its money. Unlike granite, quartz countertops are not completely natural slabs of stone in your house. Quartz in countertop form is a manufactured material — usually about 95% actual quartz and 5% a bonding agent such as a polymer resin or some other material. Different types of quartz may be used in making a single product. Styles vary from single colors to whatever you can dream up.

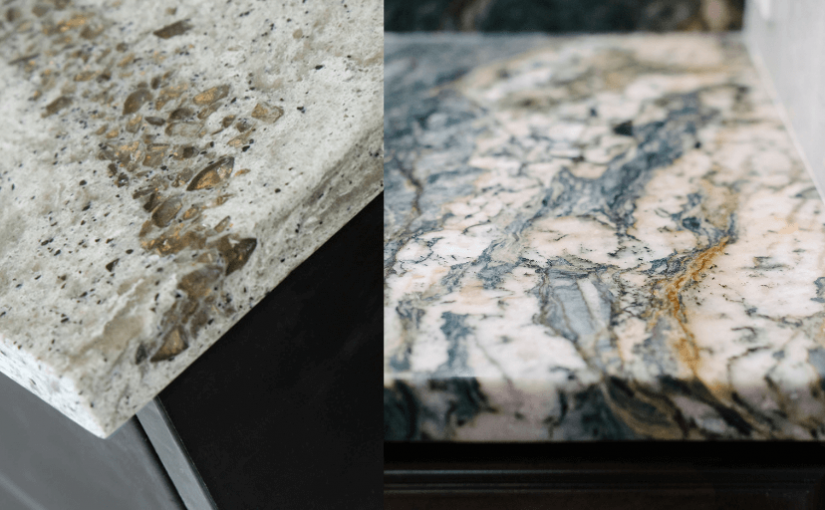
Which Countertop Looks Better?

If you’re going after granite or quartz, you’re likely also wanting something that looks great — or else you would have just gone with stainless steel commercial-grade kitchen counters. Being that granite is completely natural, the pros and cons of granite are that no two pieces of granite are identical. This can be great if you’re looking for a unique look in your kitchen, but a negative if you’re looking to replicate an exact look you saw elsewhere. Quartz, on the other hand, is extremely customizable in appearance. Choose from most colors, design patterns, and more.

Which Countertop is More Durable?

While you wouldn’t imagine that a natural stone would require much maintenance, granite countertops actually do. Most granite countertops have a seal that helps keep the stone from absorbing liquids or being overly worn and stained by kitchen elements. However, this seal has maintenance requirements of its own that should be taken into consideration when buying a granite countertop. Quartz countertops, on the other hand, don’t require much maintenance aside from being cleaned. Because they are a solid surface (meaning there isn’t a surface layer to the countertop — the entire material is the surface), they don’t require surface resealing. With that being said, because granite is a completely natural stone, it tends to hold up better to excessive heat than quartz countertops in the long run.

Which Countertop is More Affordable?

According to Home Advisor, the cost of installed granite or quartz countertops are fairly similar. The main costs associated with granite is the quarrying process as well as the shipping and shaping of the material. Quartz is a mined stone as well, but because it is engineered into its final form, shipping isn’t as nearly as an ordeal. Overall, depending on the style and size of the kitchen, granite or quartz countertops can run homeowners anywhere from $1,000-$5,000 installed.


If you’re in the process of dreaming up your ideal home, your friends at Perry Hood Properties can definitely help. See our wide variety of home designs for custom builds or existing homes with the only thing missing being you and your happy family.


Deprecated: Function get_magic_quotes_gpc() is deprecated in /home/perryhoodproperties/public_html/blog/wp-includes/formatting.php on line 4387


Deprecated: Function get_magic_quotes_gpc() is deprecated in /home/perryhoodproperties/public_html/blog/wp-includes/formatting.php on line 4387

Deprecated: Function get_magic_quotes_gpc() is deprecated in /home/perryhoodproperties/public_html/blog/wp-includes/formatting.php on line 4387

Deprecated: Function get_magic_quotes_gpc() is deprecated in /home/perryhoodproperties/public_html/blog/wp-includes/formatting.php on line 4387